

Working with Reports
3.1 Creating Reports
Section titled “3.1 Creating Reports”Go to ‘Reports’ and then click ‘Create Report’.
![]()
The ‘Add Report’ form opens. The form consists of configuration, scheduling and preview areas.
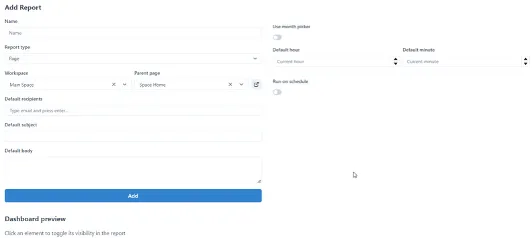
3.2 Configuring Reports
Section titled “3.2 Configuring Reports”To configure a report following parameters are to be defined:
Name
Enter the name of the report.
Report type
Select the report type:
- Page – when selected then select ‘Main Space’ and ‘Parent Page’ for the basis of report.
- Url – when selected then type the target url.
Default recipients
To configure report recipients, type the valid email addresses of the recipients separated by ‘ , ’ .
Default subject
To configure the email report subject, type the default subject.
Default body
To configure the email body, type the default body text.
3.2.1 Page Parameters
Section titled “3.2.1 Page Parameters”Workspace
Select one of the existing workspaces (profiles).
Parent page
Select one of the existing pages (dashboards) to use as report bases.
3.2.2 Url Parameters
Section titled “3.2.2 Url Parameters”Url Parameters are defined individually and are passed to the call sequentially therefore the definition order matters.
Url
Enter the Url of the page (api) to use as report bases. If Url (api) requires parameters add Url parameters.
Url parameters
To pass parameters an url defined in ‘Url’ field click ‘Add’ button under ‘Url parameters’ :
-
String - if selected specify ‘limit’, which is parameter name and string value of that parameter
-
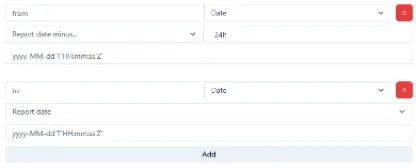
Date – if selected specify from/to as one of the following options:
- Report date minus … then specify the time offset e.g. 24hr, 7d.
- Report date plus … then specify the time offset e.g. 24hr, 7d
- Report date
- Static
For any selection specify the date/time string format required by the api url.
E.g. yyyy-MM0dd’T’ HH:mm:ss’Z’.To add an Url parameter click the ‘Add’ button.
![]()
To delete an Url parameter click the bin icon next to the parameter.

3.2.3 Report Execution Time Parameters
Section titled “3.2.3 Report Execution Time Parameters”3.2.3.1 Date/Time Selection
Section titled “3.2.3.1 Date/Time Selection”A report can be issued manually by selecting the report date/time (default current date/time) when the report is clicked.
To configure date/time selection (calendar picker) :

Use month picker:
Move the slider ‘Use month picker’ to ‘off’ position.
Default hour
Specify default hour by selecting the hour (0-23). The default is ‘Current hour’.
Default minute
Specify default minute by selecting the minute (0-59). The default is ‘Current minute’.
3.2.3.2 Month Selection
Section titled “3.2.3.2 Month Selection”Or, when ‘Use month picker’ is enabled, the user selects the month of the report (instead of date/time)
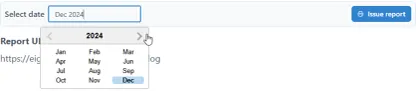
To configure month selection (month picker) :
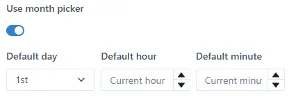
Use month picker
Move the slider ‘Use month picker’ to ‘on’ position.
Default day
Specify default day in a month (1st-31st). The default is 1st.
Default hour
Specify default hour by selecting the hour (0-23). The default is ‘Current hour’.
Default minute
Specify default minute by selecting the minute (0-59). The default is ‘Current minute’.
3.3 Scheduling Reports
Section titled “3.3 Scheduling Reports”To enable scheduler slide ‘Run on schedule’ on.

The following parameters appear when schedule is ‘on’.
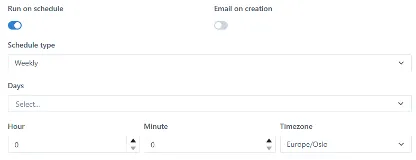
*** Run on schedule***
To enable the report to ‘Run on schedule’ move the slider to ‘on’ position. To disable the schedule, move the slider of ‘off’ position.
Email on creation
To email the report on creation, move the ‘Email on creation’ slider to ‘on’ position.
Schedule Type From the dropdown, select one of the predefined ‘Schedule types’:
- Weekly
- Monthly on day
- Monthly on date
Days
Select one or more days (Monday to Sunday) for the report to be triggered on.
Hour
Select or type ‘Hour’ the report to be triggered at. Note the actual hour affected by the ‘Timezone’ selection.
Minute
Select or type ‘Minute’ the report to be triggered at.
Timezone
Select the desired ‘Timezone’ the report to be triggered. Affects the actual time the report is triggered at.
3.4 Editing Reports
Section titled “3.4 Editing Reports”To edit an existing report, click on the report from the ‘All reports’ page. The report details page opens.

Then click ‘Edit report’ button at the top right corner.
The report configuration opens in Edit Report form. Follow steps in sec ‘Configuring Report’ to edit report parameters.
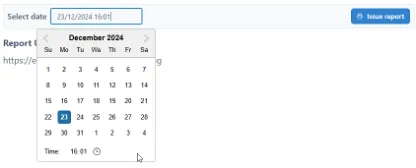
3.5 Issuing Reports
Section titled “3.5 Issuing Reports”To issue a report, select desired report from ‘All reports’ page, then ‘Select date’ using either calendar or month picker (depending on ‘Use month picker’ settings see ‘Report Execution Time Parameters’), then press ‘Issue report’ button.
![]()
3.6 Other Controls
Section titled “3.6 Other Controls”Update configuration
When the configuration on a new report or configuration is changed on an existing report is complete press ‘Update’ button to save the changes.
![]()
Viewing a report
To view a report, click ‘View report’ button at the top right corner.
Returning to all reports page
To go back to the list of all reports, click ‘All reports’ button at the top right corner.

Hiding widgets from report
To hide a widget from a specific report version while keeping it visible on the original page, simply click on the widget in the dashboard preview while editing the report. The hidden widget will appear as shown in the image below.
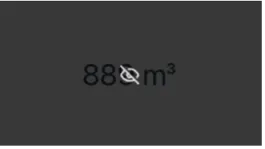
If you later wish to unhide the widget, click on it while editing the report. This feature is particularly useful for creating customized report versions of the same dashboard, which can be sent to different recipients.