

Example - Queue Times
6.4 Worked Example — Theme Park Queue times
Section titled “6.4 Worked Example — Theme Park Queue times”The example below is from our demo site:
https://ingenuity.eigen.co/pages/view/theme-park-queue-times
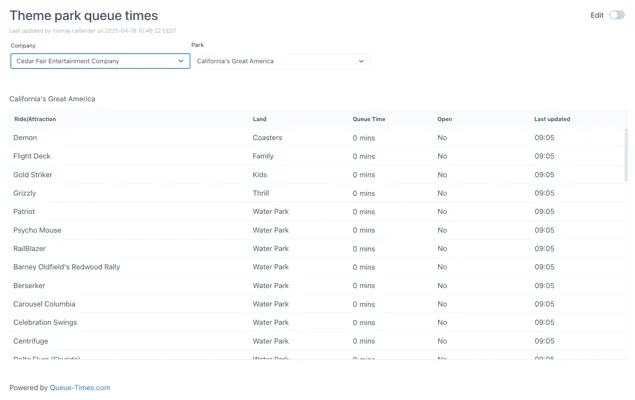
This page has two dropdown boxes where users can select the company and the park and see a list of the current queue times for all the rides.
Two variables are set up which reflect the name of the data returned from the source:
-
$company — the id of the company
-
$park — the id of the park
To follow this example, create a new Dashboard page in your own space.
6.4.1 Configuring the data source
Section titled “6.4.1 Configuring the data source”This page uses the Theme Parks and Theme Park Queue Times data sources, which are configured against a publicly available APIs to return the list of theme park companies, the theme parks for that company and finally the queue times for the rides in that theme park.

Make sure these data sources are installed and then click the “Details” button against the Theme Parks data source:
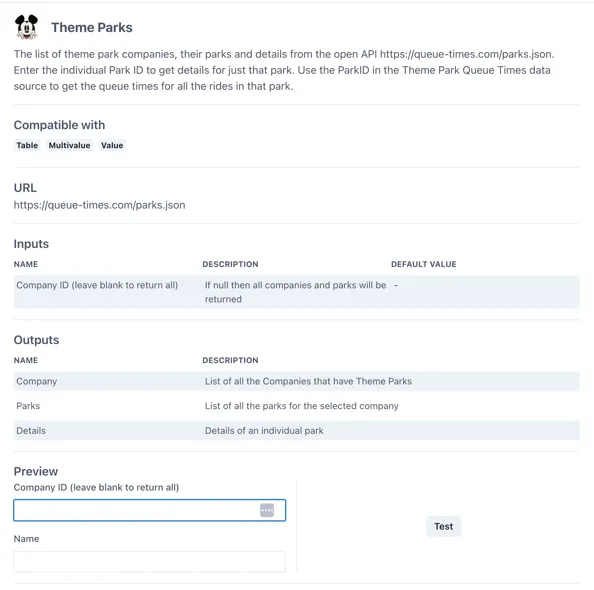
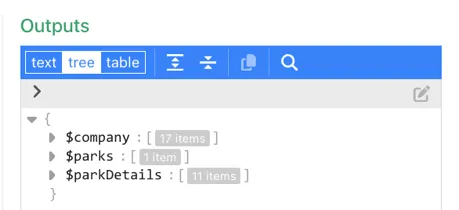
Under the “Outputs” section we can see that the data source returns three outputs “Company”, “Parks” and “Details”.
Click the “Test” button to see the data that is returned:
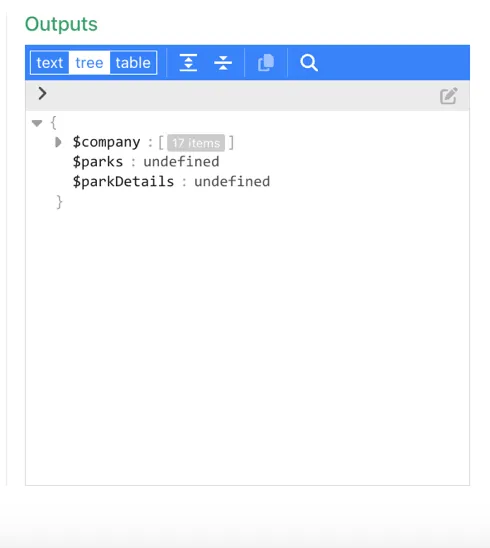
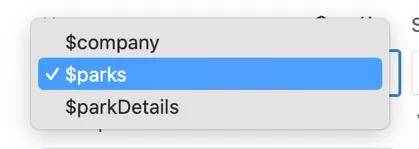
Only the $company output is populated. If we expand it we can see there is a list of companies under the path $company.n (where n is a number from 0 to n) and each company has two properties; name and id
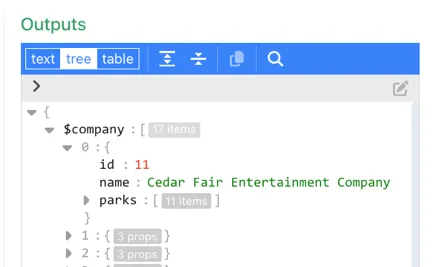
Take the id of the first company; 11 and enter it in the “Company ID” field
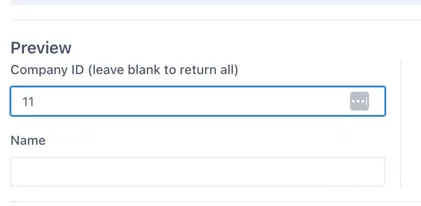
and re-test the output:
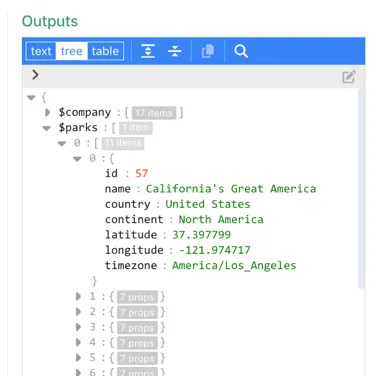
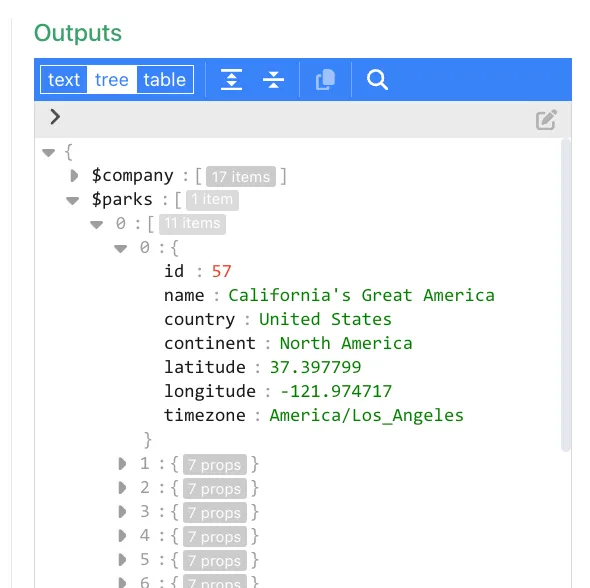
Now all three outputs have valid data. If we expand the $parks output, we can see that it has a list of parks under the sub path $parks.0.n (where n is a number from 0 to n). Each park has six properties. The ones we will be interested in are the name and id.
6.4.2 Configuring the $company variable
Section titled “6.4.2 Configuring the $company variable”In Edit mode in your blank dashboard, click anywhere on the grid and then click the “Variables” button from the right-hand panel:
Click “Add variable”
Under the “Type” dropdown select “Select from Datasource output”

Name the variable “$company”. (Remember “Select from Data source” variable names must be prefixed with ”$”).
From the “Source” dropdown, select the “Theme Parks” data source. You will see that the form automatically updates to show the inputs for the data source. We do not need to set any inputs for this variable as we would like it to return all the companies.
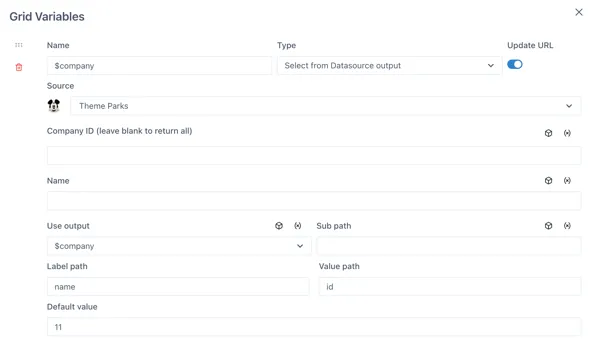
Under the “Use output” dropdown, select the “$company” output
We do not need to set anything for the “Sub path” in this case because the list of companies is directly under the $company output (recall the data source test output in section 6.2.1).
The Label and Value fields determine what the user will see (the label) vs what the dashboard will use as the value.
From the test of the data source output we did, we know there are two properties for the company (name, id). Use the “name” property for the “Label path” and the “id” property for the “Value path”. This means that the dropdown will display a user-friendly list of names but will pass the id as the value when the variable is used.
We do not need to set a default value here.
6.4.3 Configuring the $parks variable
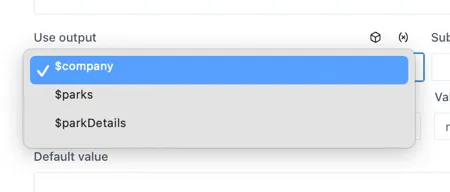
Section titled “6.4.3 Configuring the $parks variable”Click on the “Add variable” button at the bottom of the form to add a second variable. Name this one $park and again set the Type as “Select from Datasource output”.
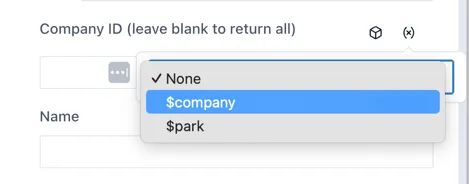
Select the “Theme Parks” data source again and under the “Company ID” input, click the “(x)” icon on the right to connect this input to one of the page variables; select the $company variable created in the previous step:
Select the “$parks” output from the “Use output” dropdown.
Remember that the data source test output (in section 6.2.1):
Because the output has the path $parks.0.n, we need to set the “Sub path” as “0”.
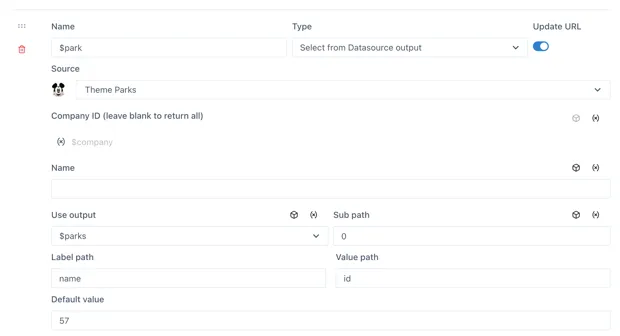
From the six available properties, we will use the “name” property under the “Label path” and the “id” under the “Value path”.
Save the Grid variables form and the page.
6.4.4 Add the select boxes to the page
Section titled “6.4.4 Add the select boxes to the page”Add two “Control” components to the page:
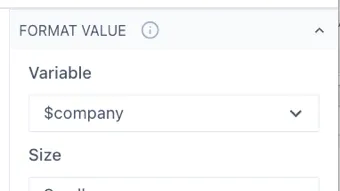
Configure the first control to use the “$company” variable under the “Format Value” section:
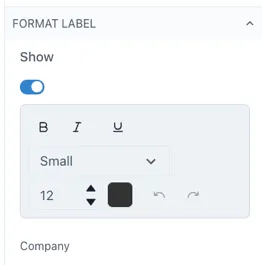
And enter the text “Company” in the “Format Label” section:
Repeat this for the second Control, but this time using the “$parks” variable. The controls should now look something like this:

6.4.5 Configure a table to use the variables
Section titled “6.4.5 Configure a table to use the variables”Add a “Data table” component to the page.
![]()
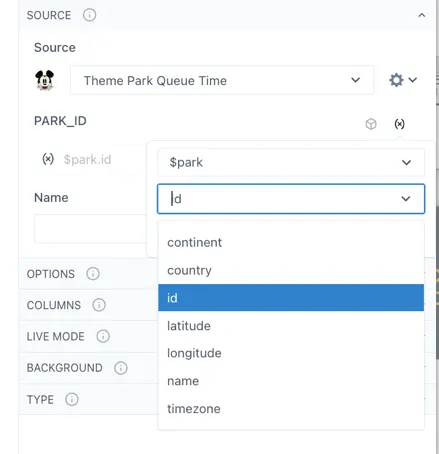
In the Source section, select the Theme Park Queue Time data source. The input for the “PARK_ID” will appear below. Click the “(x)” icon on the right to connect this input to one of the page variables and select the “$Park” variable. In the “select” dropdown below the variable, select the “id” property.
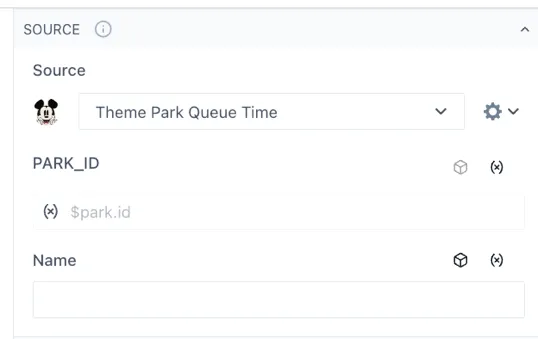
The table Source section should now look like this:
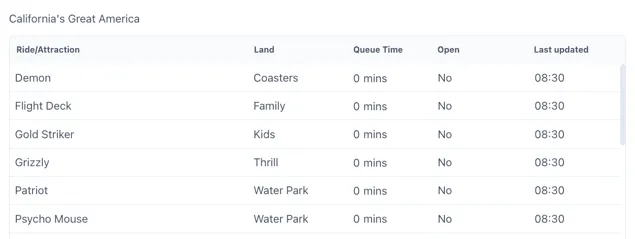
Now configure the table in the normal way, making columns for the Ride, Land, Queue Time and any other fields you would like.
Save the dashboard.
6.4.6 Sharing the link with a friend
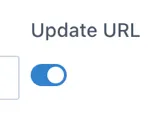
Section titled “6.4.6 Sharing the link with a friend”If the Update URL switch is set to “on” for both variables, the current selection will be “remembered” in the URL to create a shareable link.
For example, if a friend is at Disneyland in Florida (Company ID = 2, Park ID = 16) , you could send them this link:
In this link, notice there is a ‘=2’ and ‘=16’