

Flight Radar Data source
6 Worked Examples
Section titled “6 Worked Examples”The following sections contain some worked examples. These examples are used as the basis for the worked examples in the Dashboards. Access to Ingenuity Hub within your subscription is required for all of these examples as they must be created as a Datasource Template first.
6.2 Flight Radar 24 Datasource
Section titled “6.2 Flight Radar 24 Datasource”This data source accesses publicly available flight data from FlightRadar24.
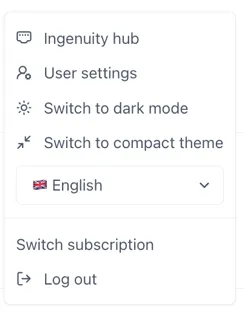
Access Ingenuity Hub by clicking on your user in the bottom left corner and selecting “Ingenuity Hub”
Go to the “Datasource templates” tab and click the [Add datasource template] button:

6.2.1 Enter the metadata
Section titled “6.2.1 Enter the metadata”Enter the following data:
Name: FlightRadar24
nameID: flightradar24
Description: Use the docs from the API to put together a useful description for users: https://fr24api.flightradar24.com/docs/getting-started
Search the web for a FlightRadar24 logo and upload it.
6.2.2 Configure the data source
Section titled “6.2.2 Configure the data source”The URL of the API is: https://api.flightradar24.com/common/v1/airport.json
The request is a standard “GET” request where the parameters are appended to the end of the request, i.e.
<api>?parametersTherefore, the first two lines of the datasource are:
"url": "https://api.flightradar24.com/common/v1/airport.json","type": "GET",Before we can test the data source we may need to force it to use the Proxy service (i.e. be sent from the back-end server rather than the users machine) and we may as well take the time to also configure the “compatibleWith” parameters. Configure the following parameters;
"useProxy": false,"compatibleWith": [ "table"]if there are any cross site scripting limitations or users machines do not have access to the data source. Configure the useProxy as “true”
6.2.3 Configure the inputs
Section titled “6.2.3 Configure the inputs”There are three inputs;
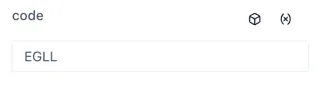
code: Required - The IATA or ICAO code for the airport
format: optional json or csv
limit: optional the maximum number of records returned
Therefore the inputs section of the data source is configured as follows:
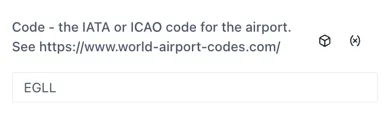
"inputs": [ { "name": "code", "type": "get", "label": "Code - the IATA or ICAO code for the airport. See https://www.world-airport-codes.com/", "description": "IATA codes are three-letter identifiers used in ticketing and passenger systems, while ICAO codes are four-letter identifiers used by air traffic control" }, { "name": "format", "type": "get", "default": "json", "label": "Optional. The format of the dataset to return", "description": "The format of the dataset to return" }, { "name": "limit", "type": "get", "default": 10 }]When no “label” property is set, the input field will show the name:
Setting the “label” property helps users and makes the data source easier to use:
Configuring the outputs
Section titled “Configuring the outputs”The outputs are configured in the output section and as a minimum require a “name” and “path”.
"output": { "paths": []}The path is the json path expression to extract the data from the API response
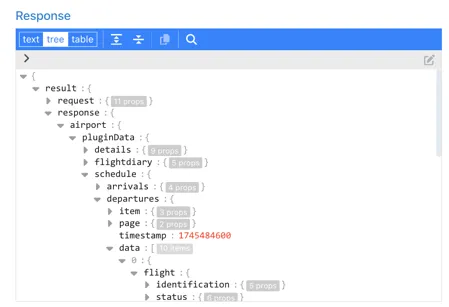
With the inputs set, we can now use the Test button at the in the Preview section to check the response from the API. Enter an airport code (e.g. LHR) and click Test. You should see the following in the Response window:
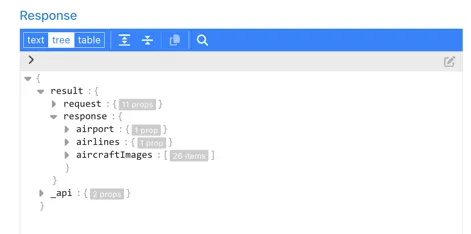
Explore the response to find the data you would like. For the purpose of this example, we are going to use the data in the $.result.response.airport.plugindata section:
Configure the outputs you would like to return.
To make it easy for users, all the outputs are prefixed with Arrival or Departure so that they are grouped in the dropdown selection. This makes it easy for users to find the right field.
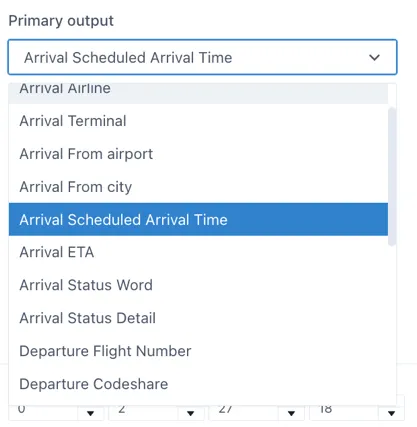
For the purpose of this exercise, we will look at the configuration of 2 examples as this covers the two data types needed:
-
Arrival Flight Number
-
Arrival Scheduled Arrival Time
Arrival Flight Number
Section titled “Arrival Flight Number”The flight number of arriving flights is found under the ..schedule.arrivals.data.0.flight.identification.id
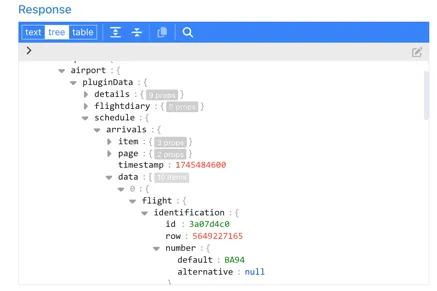
To return all of the records as an object we replace the “0” with ”*”, so the configuration is as follows:
{ "name": "Arrival Flight Number", "path": "$.result.response.airport.pluginData.schedule.arrivals.data.*.flight.identification.number.default", "description": "The commercial flight number, typically assigned by the airline."}Arrival Scheduled Arrival Time
Section titled “Arrival Scheduled Arrival Time”The scheduled arrival time is also in the “flight” section of the response under ..time.scheduled.arrival:
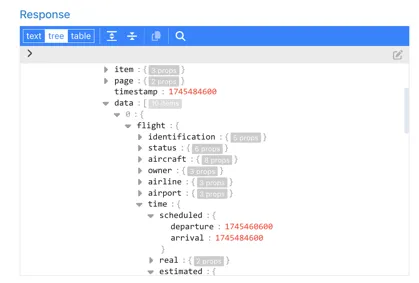
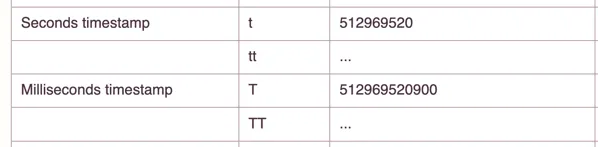
The format is a Unix Epoch Timestamp — a 10-digit number representing the seconds since 01 Jan 1970 UTC. There is no timezone information in the timestamp ( although the timezone of the airport is available in the ..airport.plugindata.details.timezone section of the response)
To make sure that UI components can use this as a true date object, rather than a string, we will specify the data type and format as part of the output:
The matching format code for this format from date-fns.org (https://date-fns.org/v4.1.0/docs/format) is “t”.
The configuration of the output is:
"name": "Arrival Scheduled Arrival Time","path":"$.result.response.airport.pluginData.schedule.arrivals.data.*.flight.time.scheduled.arrival","format": { "type": "date", "pattern": "t"},Add configuration for any other Arrivals and Departure fields you would like to make available to users.
Save the data source template by clicking the Update button at the bottom of the form:
